The dining room is where everybody ends up, so it deserves more than a bare wall and a lonely fruit bowl! These 26 DIY dining room decor ideas cover the whole room, from the walls down to the table. You’ll find hand painted wall art, a plate wall, a quote print, an iron pipe photo display, a wood cage pendant light and a copper chandelier glow-up. For the table there are centerpieces, candle holders, a burlap runner, denim placemats, coasters and a napkin you fold into a rose. Need seating or storage? There are no-sew upholstered chairs, a buffet makeover, a rolling bookshelf, a beverage bar and a styled hutch. Most use thrift finds, scrap wood or a can of spray paint, so you can start small with one weekend project and keep going.
1. DIY Jute Rope Tray
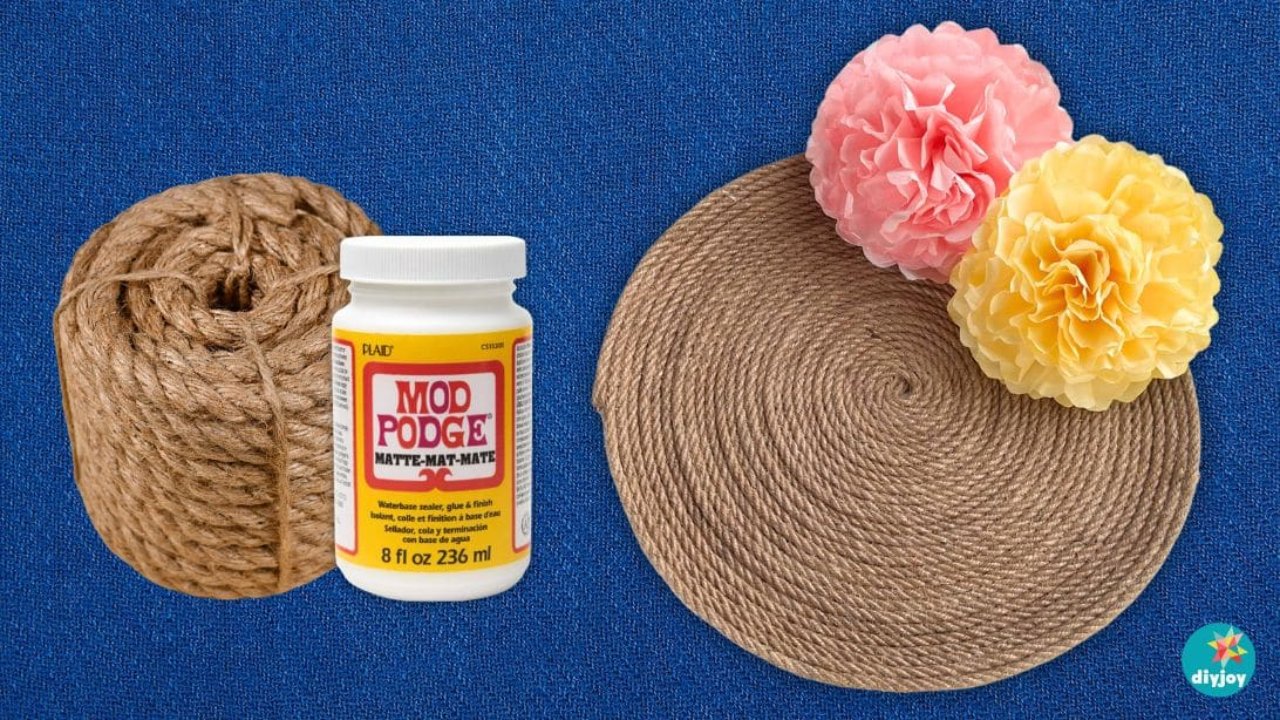
A DIY jute rope tray gives a plain table that cozy, woven texture for a few dollars. Cover a round tray with cling wrap, brush on a thick layer of Mod Podge, then coil the rope in a tight spiral from the center out, pressing and gluing as you go. Cut the end, tuck it under and coat the whole thing again. Let it dry flat with a little weight on top, then peel it off the wrap. Fill it with candles, paper flowers or fruit for an easy centerpiece.
Get the full tutorial at DIY JOY.
2. DIY Wood Box Centerpiece
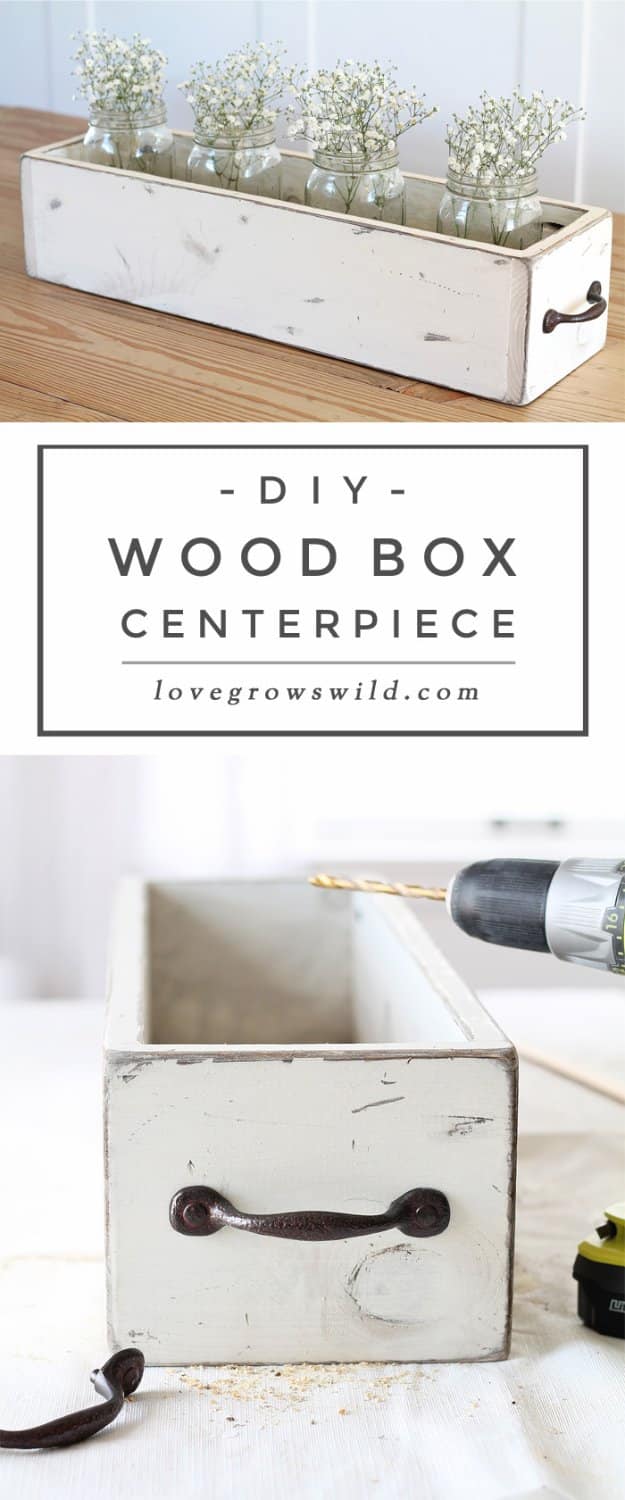
Every long farmhouse table needs something low down the middle, and this DIY wood box centerpiece is just right. Cut three 1×6 boards for the bottom and long sides and two short ends, drill pocket holes and screw it together into a box about 2 feet long and 7 inches wide. Stain it dark walnut, brush on chalk paint, then run a putty knife along the edges so the paint chips off in rough patches. Add a pair of old drawer pulls and fill it with jars of flowers.
Get the full tutorial at Love Grows Wild.
3. DIY Dine Well Wall Sign
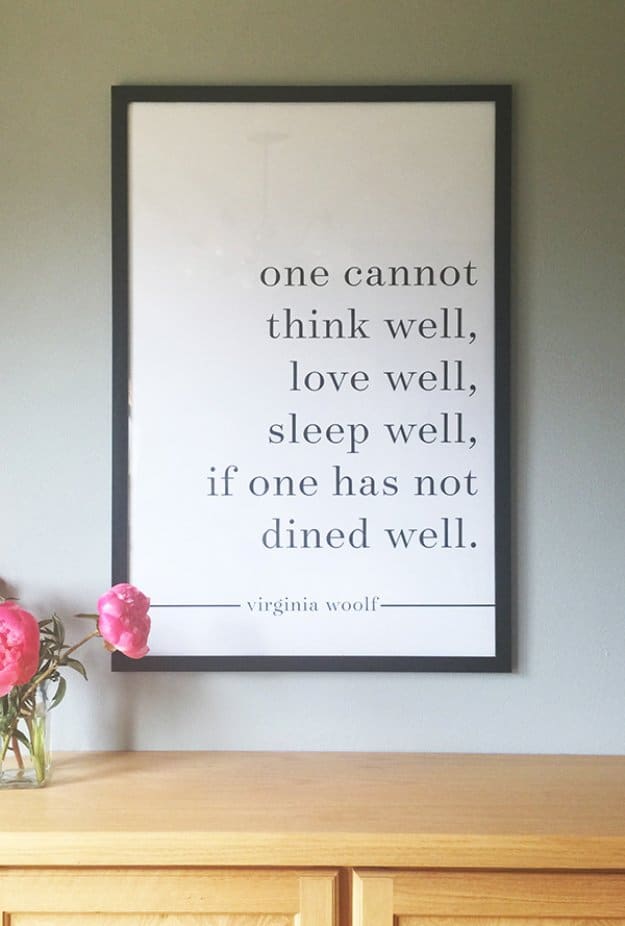
Big wall, tiny budget? This DIY dine well wall sign is a giant quote print that costs about $3 to make. The design pairs a Virginia Woolf line about how dining well comes before thinking, loving and sleeping well, set in clean black type on white. Download the free file in a 24 by 36 or 8.5 by 11 size, then have it printed on plain paper at an office supply store. Pop it into a simple black poster frame and hang it over a sideboard for an instant focal point.
Get the full tutorial at Thyme is Honey.
4. Easy Burlap Lace Table Runner
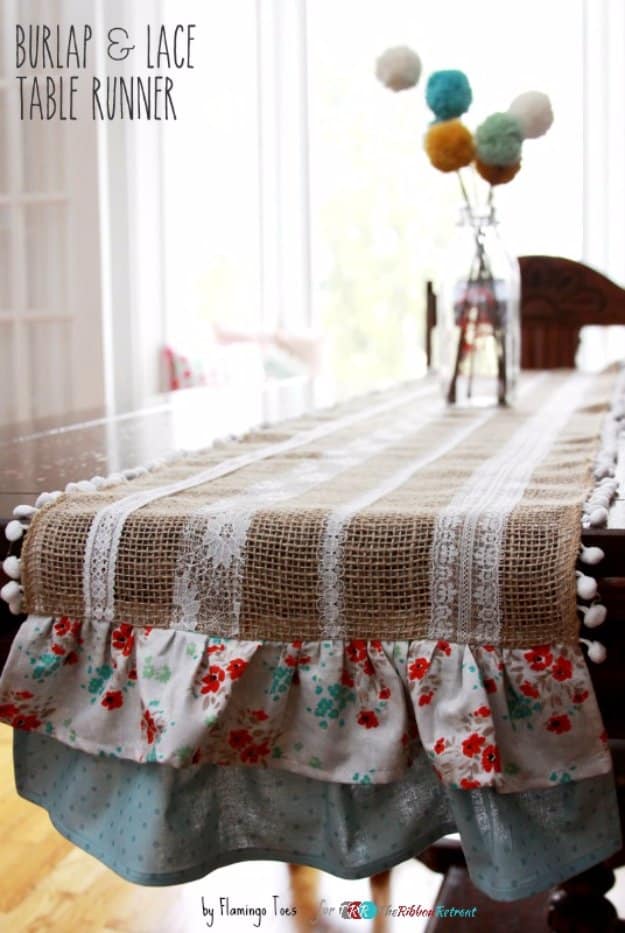
An easy burlap lace table runner mixes rustic and pretty in one strip of fabric. Start with a ready made burlap runner about 11 inches wide so the ends are already finished. Lay out four kinds of lace in rows about 1 1/2 inches apart, using washi tape as a straight guide, and sew each one down. Stitch pom pom trim along both long edges. For extra charm, hem two layers of printed fabric, gather them into ruffles and sew them across each end. Press with a cloth to protect the lace.
Get the full tutorial at The Ribbon Retreat.
5. Dining Room Wall Art
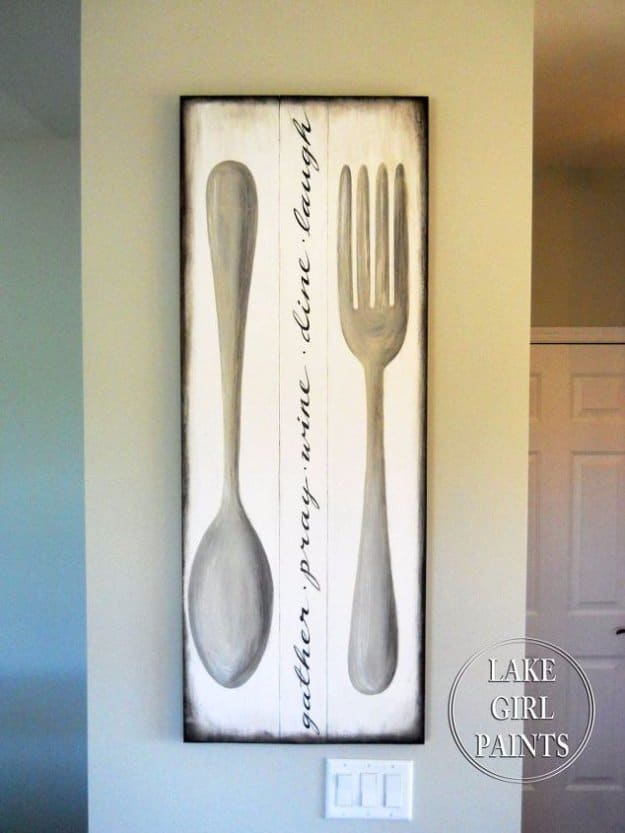
This dining room wall art is a giant spoon and fork painted on joined boards, with gather, pray, wine, dine and laugh in script down the middle. Two 1×8 boards and a 1×4, each 48 inches long, get backed with a sheet of utility panel. Base coat in a brown wash, top coat in off white and lift the brush before the edges so a brown frame shows. Trace the pattern on, paint with tan and black, dry brush white highlights, then run a butter knife between the boards for a planked look.
Get the full tutorial at Lake Girl Paints.
6. DIY Weathered Gratitude Sign
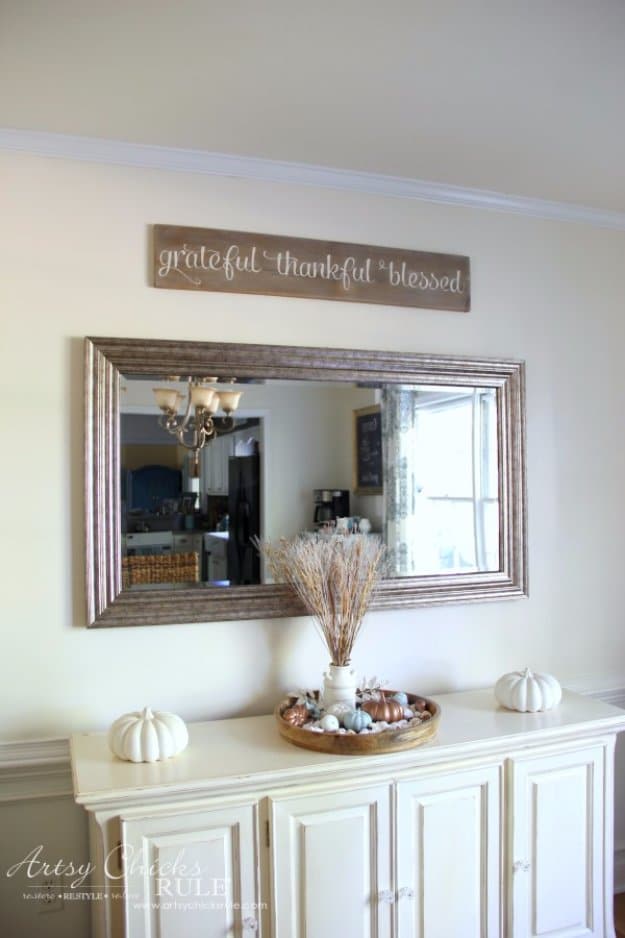
A DIY weathered gratitude sign can come together from a scrap board you already own. Lightly sand the edges, then brush on a wood weathering finish in a few coats until it’s as gray as you like. Wash a little white chalk paint over the top. Print grateful, thankful, blessed in a pretty script, rub chalk on the back of the paper, lay it on the board and trace. Hand paint the letters with small artist’s brushes, then sand lightly to distress. It takes about 30 minutes once the board is ready.
Get the full tutorial at Artsy Chicks Rule.
7. DIY Denim Pocket Placemats
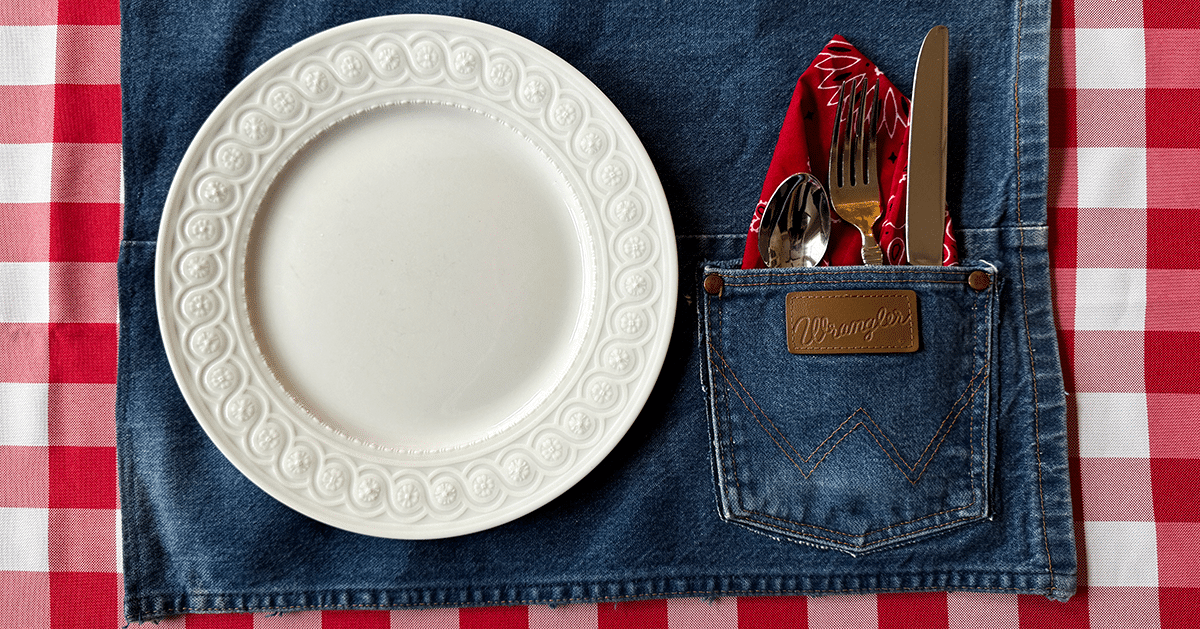
Old jeans make the cutest DIY denim pocket placemats, and there’s no sewing at all. Use sturdy, non stretch denim. Slit each leg up the outside seam, cut it off at about 22 inches, flatten it and trim to 14 by 19 inches. Cut a back pocket out close to the seam, leaving a small border. Fold every edge under 1/4 inch, press with the iron and glue the hems down with fabric glue, holding them with clips while they dry. Glue the pocket on and tuck the silverware inside.
Get the full tutorial at DIY JOY.
8. DIY Industrial Pendant Light
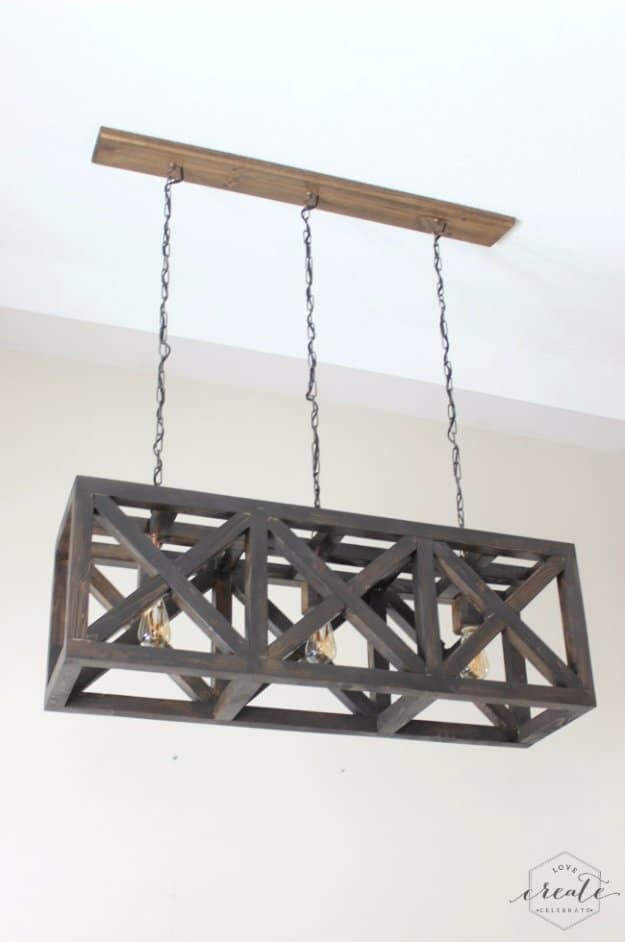
Tired of a dated light that isn’t even centered over the table? This DIY industrial pendant light fixes both. The open wood cage is built from a free set of plans: glue and clamp the side frames, drill matching holes with a simple jig for the dowels, notch the cross pieces and drill a 2×4 block for the wiring. Assemble, plug the screw holes, sand, then stain and varnish. Add copper pipe accents with epoxy, wire three sockets and hang it all from decorative chain kits.
Get the full tutorial at Lindi & Russ.
9. Cloth Napkin Rose Fold
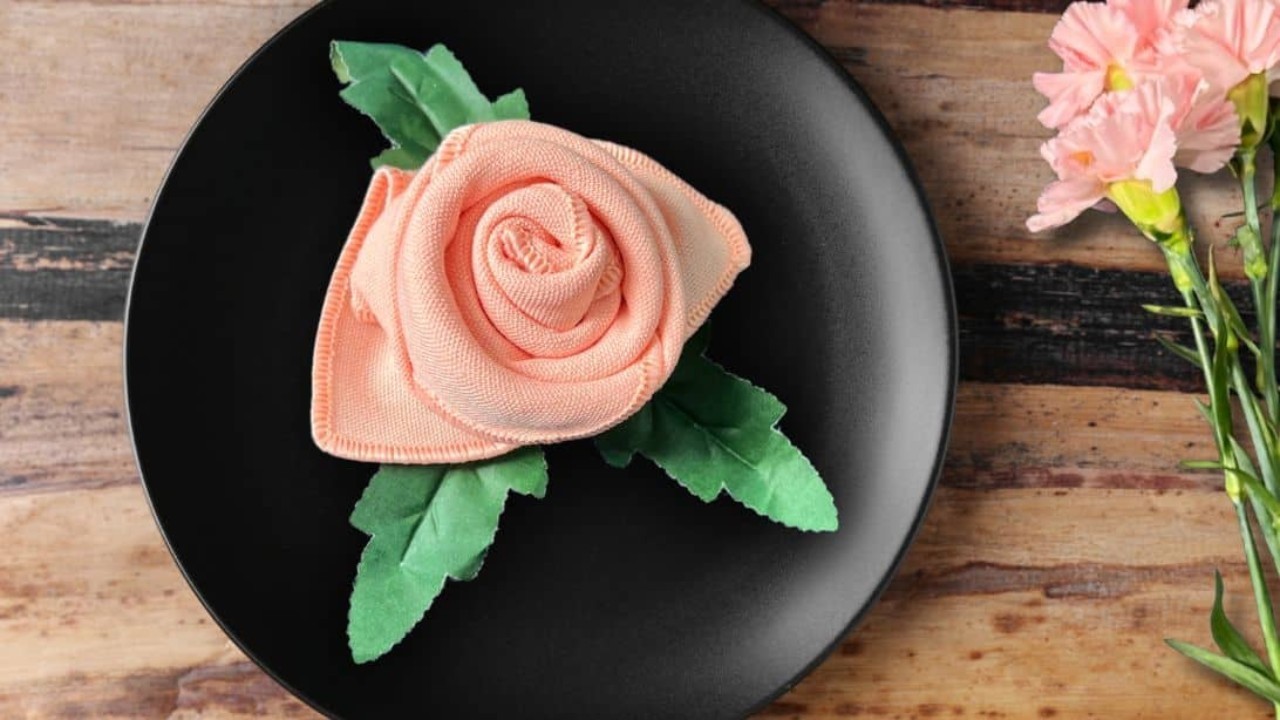
A cloth napkin rose fold makes any place setting look like a fancy restaurant. You need a square cloth napkin, since paper ones are too thin. Fold it in half into a triangle, then roll from the long straight edge, leaving about 2 3/4 inches of fabric at the top. Hold the end and tuck it neatly into the fold. Stand it up, separate the top layers and fold them down, then flip it over. Tug a few layers loose so the rose looks real.
Get the full tutorial at DIY JOY.
10. DIY Glass Bead Candle Holder
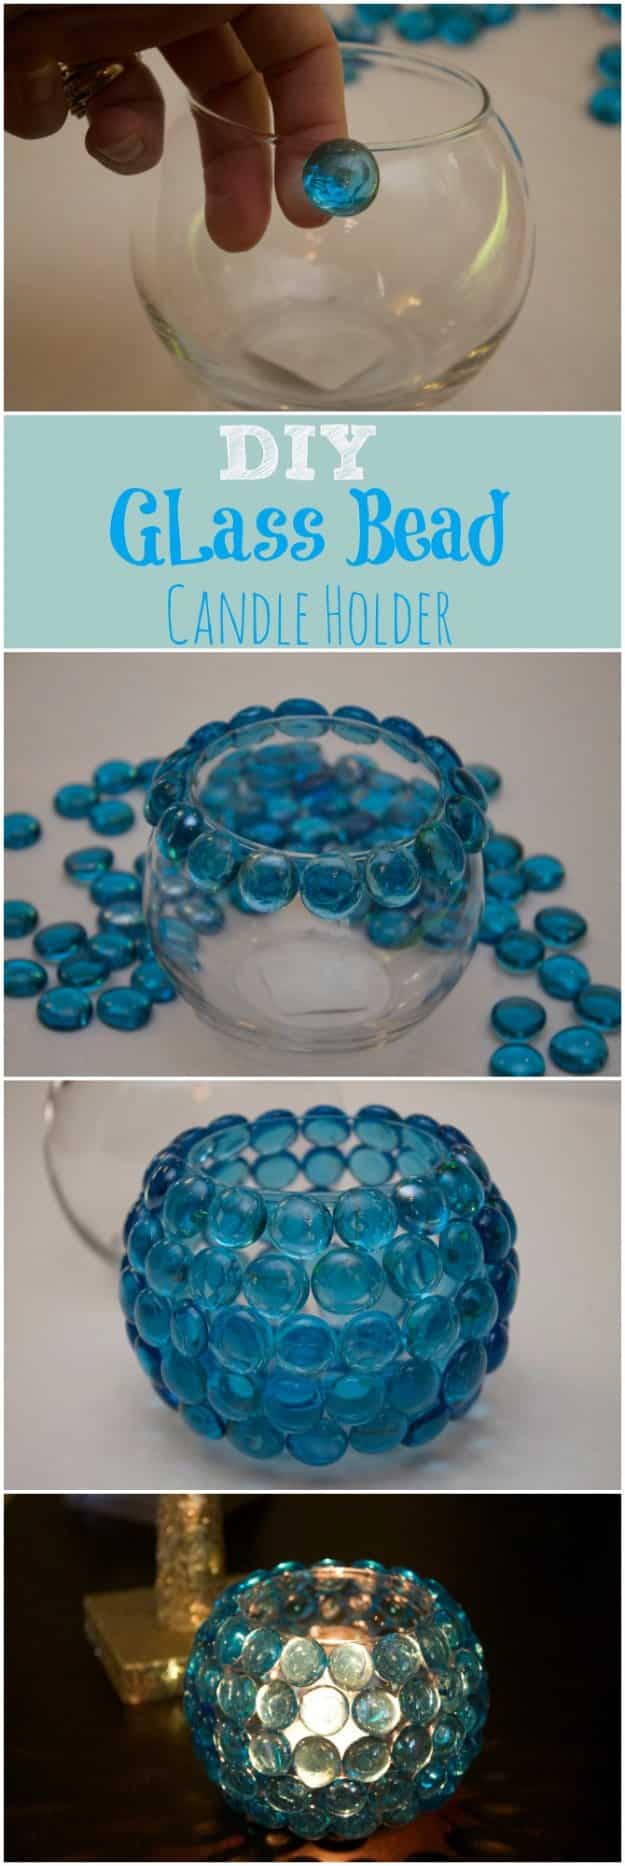
This DIY glass bead candle holder costs about $2 with supplies from the dollar store. Grab a small round glass bowl and a bag of flat glass beads. Dab hot glue on the back of a bead, press it right at the rim, and keep going in a line all the way around. Start the next row directly below, getting the beads as close as you can, and keep working down until the glass is covered. It takes about 20 minutes, and it sparkles when the candle is lit.
Get the full tutorial at Mom Luck.
11. Decorative Plate Wall
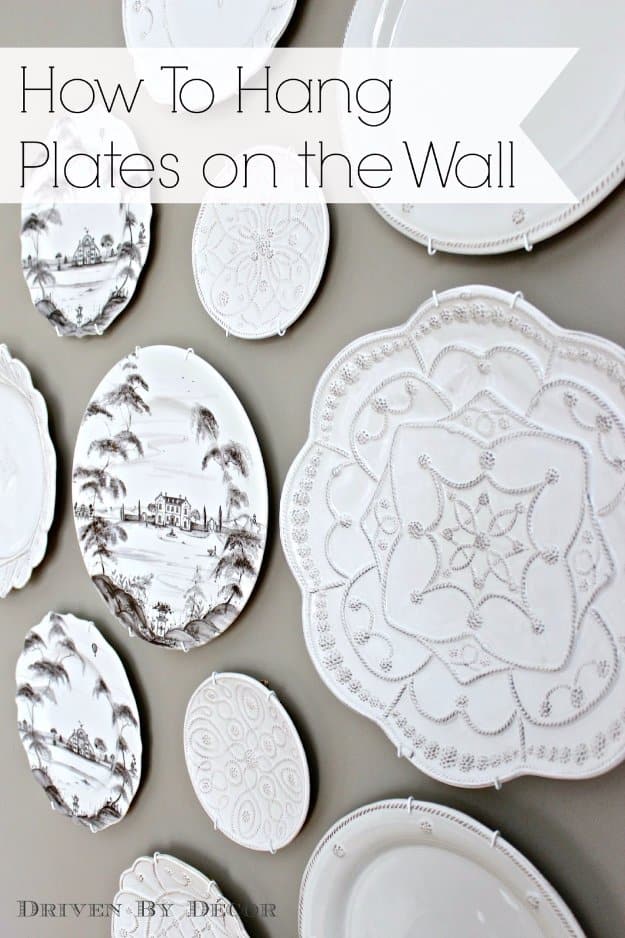
A decorative plate wall takes pretty dishes out of the cupboard and puts them on display. Lay every plate out on the floor first, using painter’s tape to mark how much wall space you have, and play with the arrangement. Trace each plate onto kraft paper, cut them out and draw a cross through the center of each. Tape the paper templates to the wall with a level, then hang the real plates. Spring style wire hangers suit plates with raised backs, and adhesive discs work on smooth ones.
Get the full tutorial at Driven by Decor.
12. DIY Beverage Bar
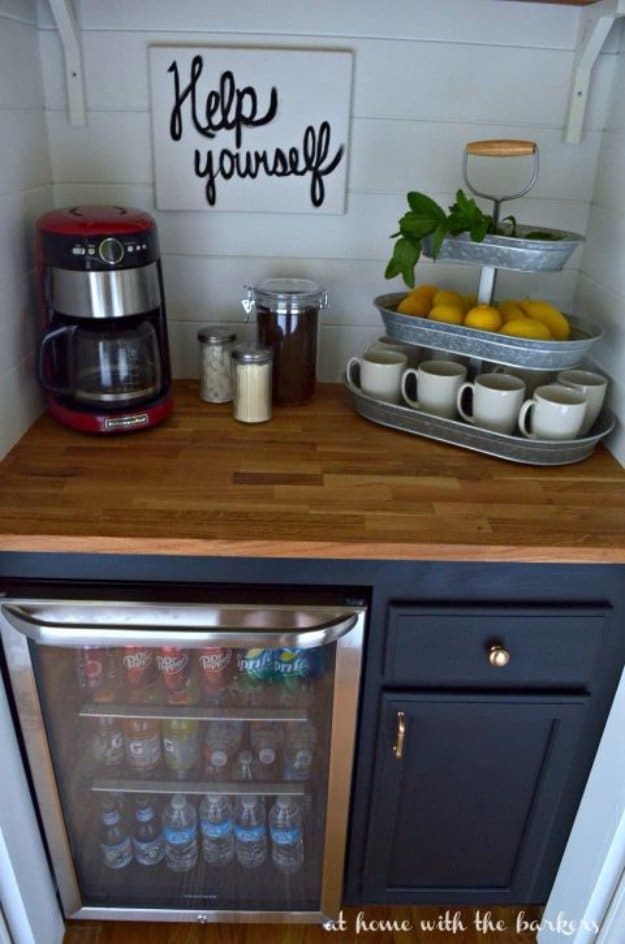
That cramped closet between the dining room and kitchen could be a DIY beverage bar instead. Take off the doors and frame, patch the floor with leftover hardwood and stain to match. Build a back wall, sized to fit a slide in base cabinet and a mini fridge. Screw support boards to the side walls, then set a butcher block countertop on top and condition it. Cover the walls in white planks and add open shelves on cheap brackets. It frees up kitchen counters and holds desserts at parties.
Get the full tutorial at At Home With The Barkers.
13. No-Sew Felt Fruit Coasters
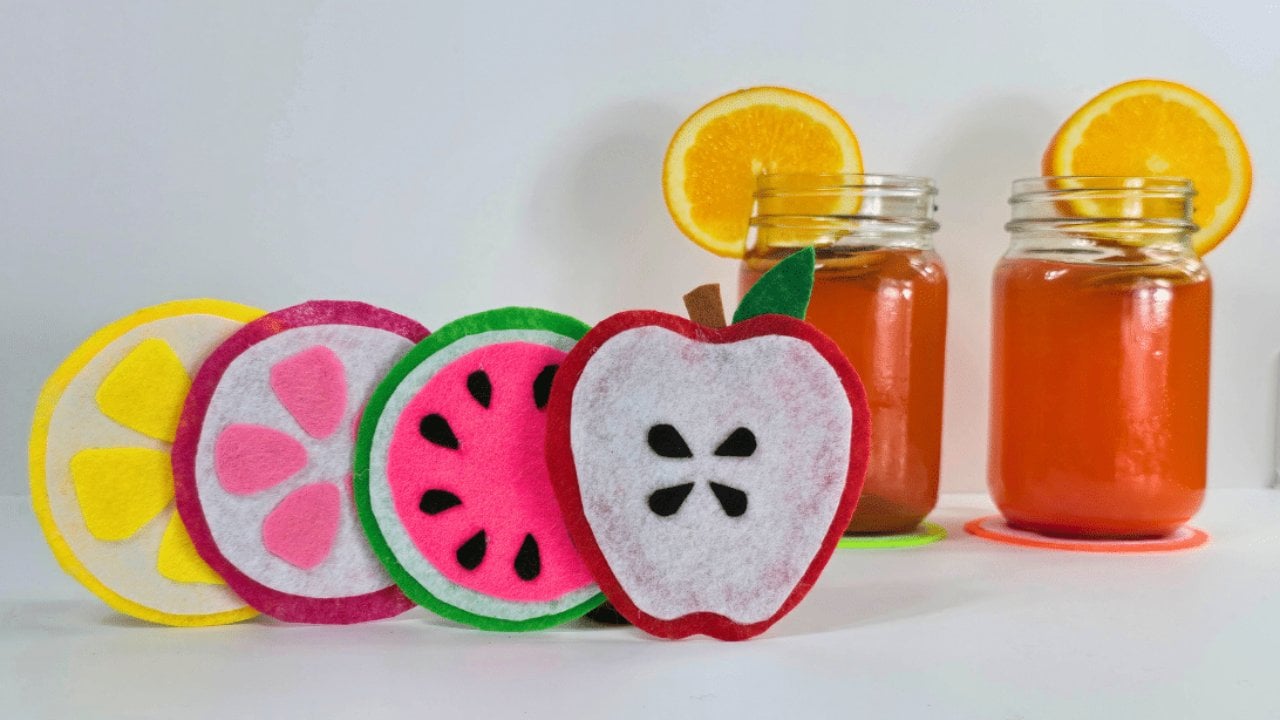
No-sew felt fruit coasters are summer on the table, and they’re done in under an hour. For a lemon, glue a white felt circle onto a bigger yellow one, then add five little yellow triangles as segments. A watermelon stacks green, white and pink circles with black teardrop seeds on top. The apple starts from a paper template with a white center, black seeds, a leaf and a stem. Use stiff craft felt so they hold their shape, and apply hot glue sparingly so nothing gets lumpy.
Get the full tutorial at DIY JOY.
14. Resin Coaster With Dried Flowers
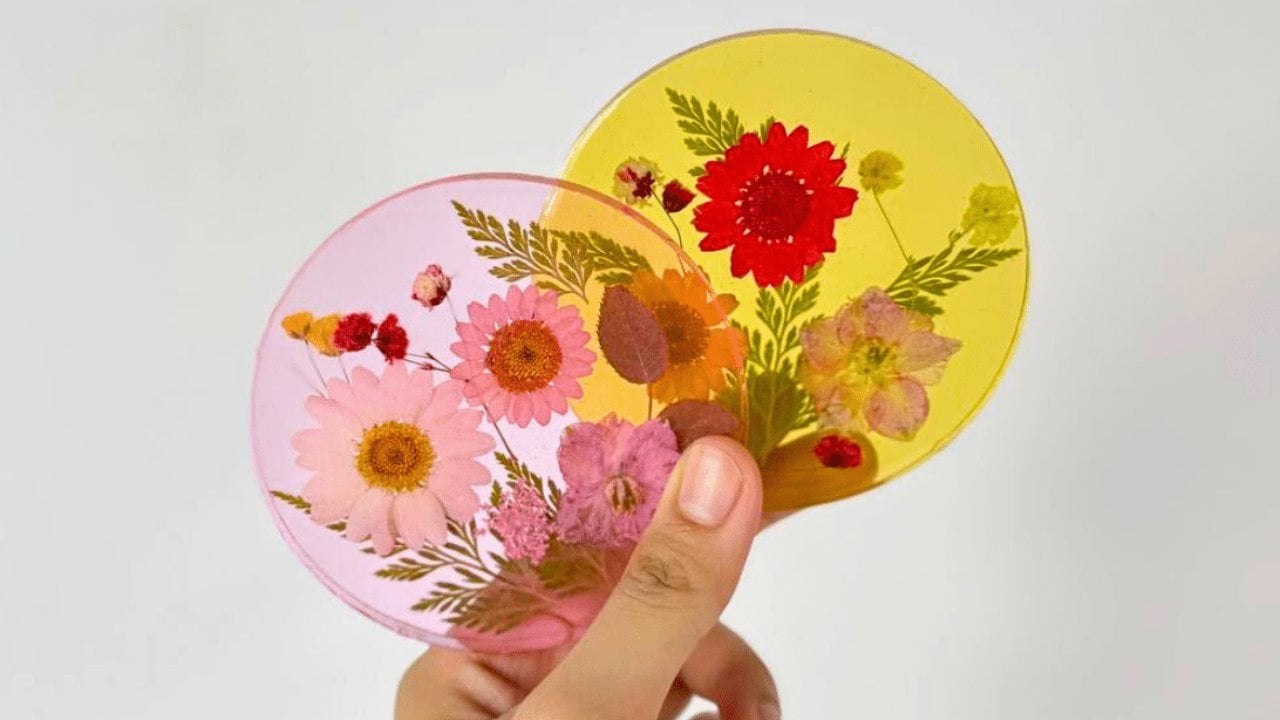
A resin coaster with dried flowers keeps a pretty bouquet forever. Wearing nitrile gloves, mix epoxy resin and hardener at a 3 to 1 ratio, stirring slowly for 5 to 10 minutes until clear. Add two or three drops of pigment. Pour half into a clean round mold, arrange pressed flowers with tweezers, then pour the rest over the top and pop bubbles with a lighter. Let it cure overnight. Glue the back, brush UV resin across the front, cure it under the lamp and peel the glue off.
Get the full tutorial at DIY JOY.
15. DIY Decoupage Vase
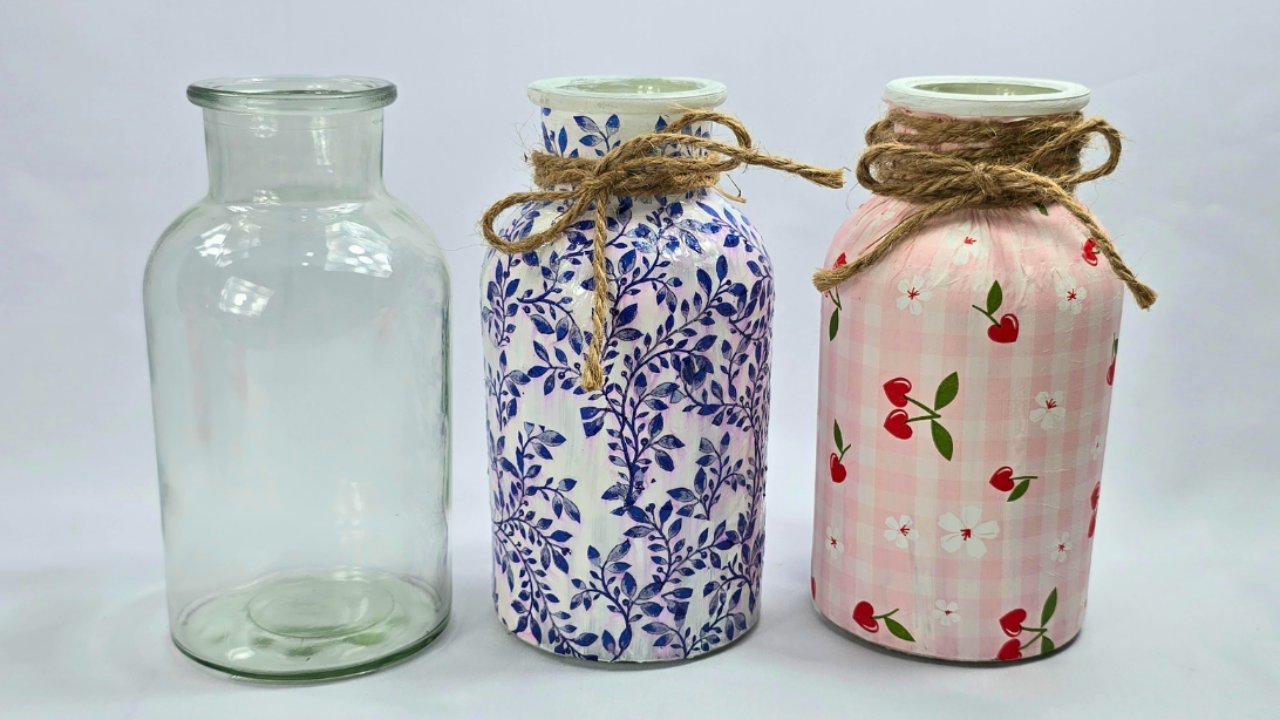
A DIY decoupage vase starts with a plain glass jar from the recycling bin or the dollar store. Clean the outside and paint it solid white, adding a second coat if the glass shows through. Pick a printed paper napkin, cut out the motifs close to the pattern and peel away the plain backing layers. Brush Mod Podge onto the jar, lay the napkin piece on and brush more over it, working from the center out so it doesn’t tear. Seal it with UV resin or clear nail polish for shine.
Get the full tutorial at DIY JOY.
16. Restyled Copper Chandelier
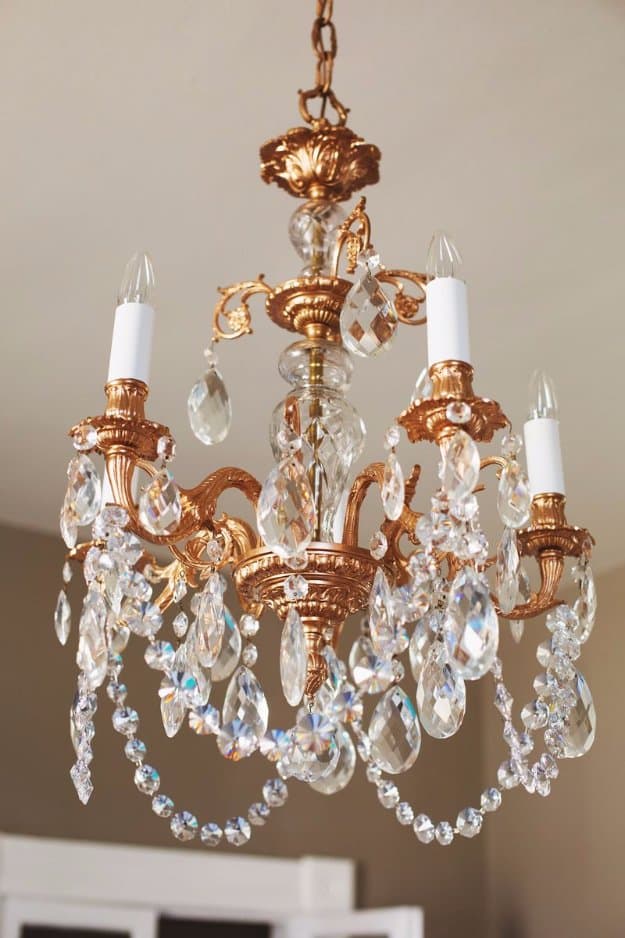
Before you replace a tired light fixture, try this restyled copper chandelier makeover. When scrubbing won’t bring back the old metal, take the crystals off, tape over the glass and candle parts, and spray the frame with a few coats of copper paint outside. While it dries, soak the crystals in warm, soapy water so they sparkle again. Hang them back on, add a few extra octagon crystal chains for more drama, slip on new candle sleeves and swap in fresh bulbs. Dingy to dazzling!
Get the full tutorial at A Beautiful Mess.
17. DIY Faux Milk Glass Centerpieces
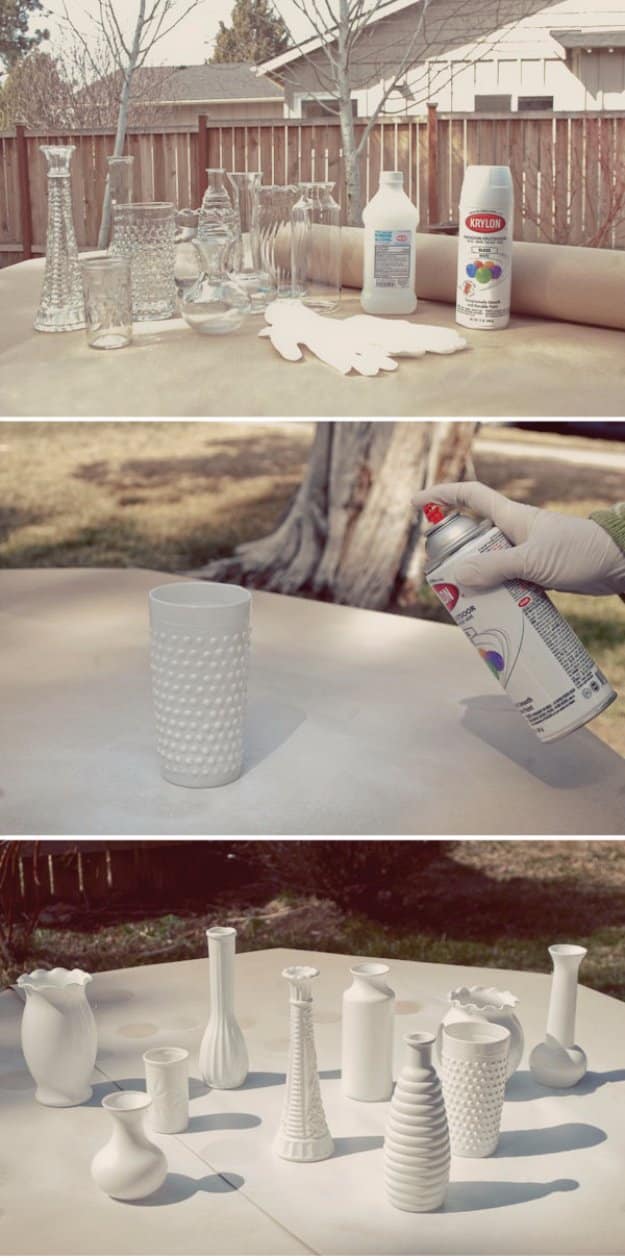
Real milk glass is hard to find, but DIY faux milk glass centerpieces look the part for pennies. Hunt the thrift store for textured glass vases, like hobnail and ribbed shapes. Wipe off sticky labels with rubbing alcohol, wash and dry them. In a well ventilated spot, spray the outsides with glossy white spray paint from side to side, rotating each vase. Skip the insides so water won’t flake the paint. Let them dry, add a second coat, then group them down the table with flowers.
Get the full tutorial at Ruffled.
18. Vintage Buffet in Iron Ore
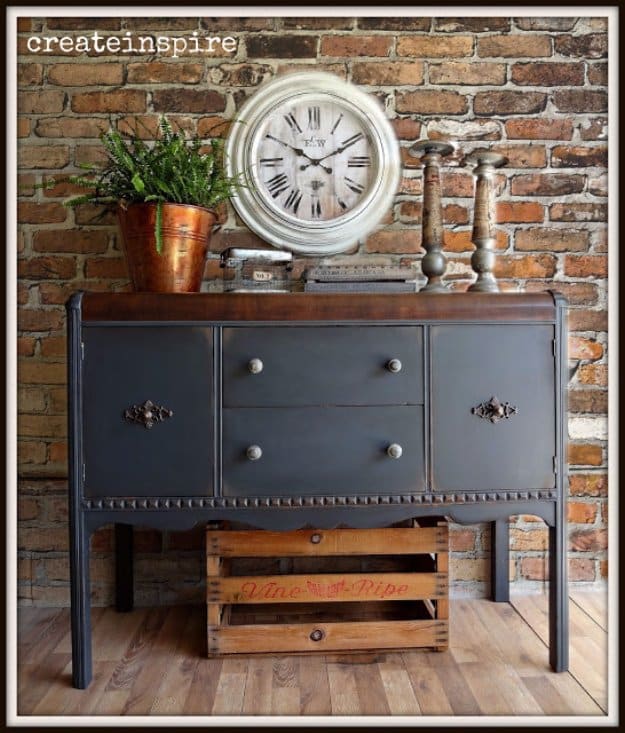
This vintage buffet in Iron Ore shows what a can of paint and new hardware can do. A small waterfall style sideboard with simple lines gets a moody slate gray finish while the cherry top stays natural wood for contrast. The old pulls come off, and fancy knobs go on, with gilding cream rubbed over them to pick out the detail. Line the drawer bottoms with pretty paper and seal it with Mod Podge for easy wipe ups. It’s ideal for a small dining room.
Get the full tutorial at createinspire.
19. Easy Hanging Planter DIY
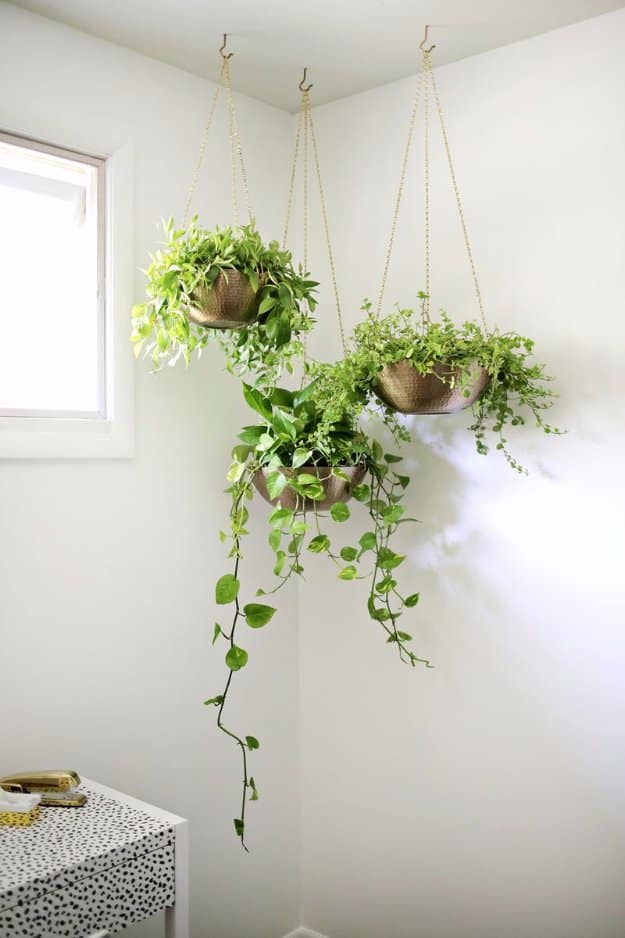
An easy hanging planter DIY puts greenery in the corner without taking up floor space. Drill three evenly spaced holes about 1/2 inch below the rim of each metal bowl, working onto scrap wood. Spray quick links and screw hooks gold to match. Open chain links with needle nose pliers to cut lengths of 38, 28 and 20 inches. Hook each chain to a bowl with quick links, plant trailing plants, then join the chain tops on one screw hook in the ceiling, using an anchor if needed.
Get the full tutorial at A Beautiful Mess.
20. Iron Pipe Family Photo Display
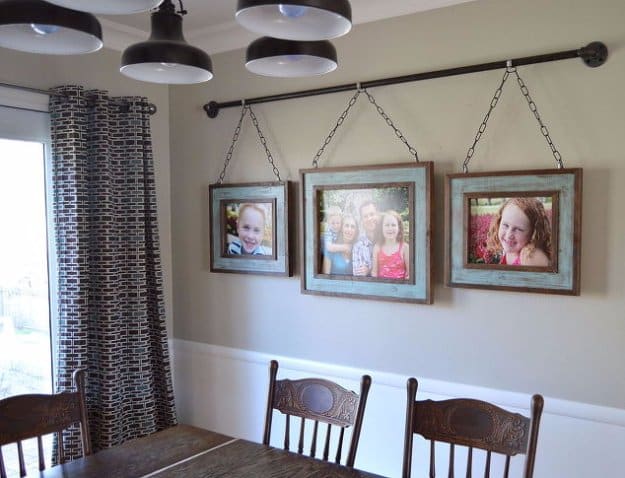
An iron pipe family photo display hangs big framed pictures in a way nobody else on the block has. Ask your local hardware store to cut a length of 3/4 inch black steel pipe and thread both ends. Add two flanges, two elbows, eight anchors and eight screws, about $40 in all. Hold the pipe up at the same height as nearby curtain rods, level it, mark the holes and screw it into the anchors. Hang the frames from the rod on lengths of chain for an industrial look.
Get the full tutorial at Kruse's Workshop.
21. DIY Pallet Wine Bar
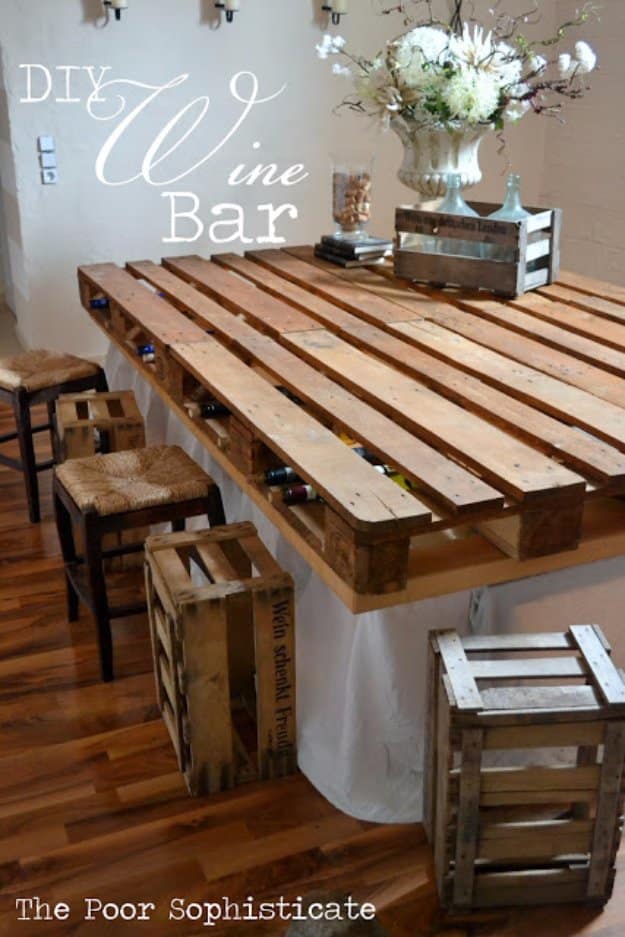
A DIY pallet wine bar can cost absolutely nothing if you’ve been saving free pallets. Four pallets laid side by side on a low surface create a bar top with built in slots for wine bottles, and the gaps between the slats still let light through. Drape a long linen cloth or drop cloth around the base and staple it in place to hide what’s under it. Pull up wine crates and stools for seating. Stack pallets on folding tables for the same look at a party.
Get the full tutorial at The Poor Sophisticate.
22. Rolling DIY Bookshelf
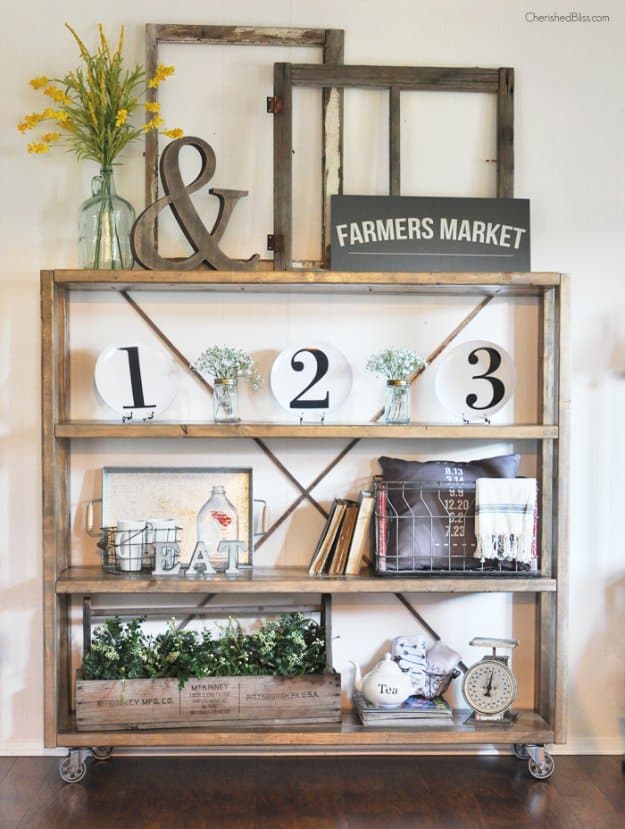
A rolling DIY bookshelf fills an awkward dining room corner with open storage that moves when you need it to. Build it from free online plans, widening the shelves to about 57 inches and attaching the top shelf flush with pocket holes. Swap the back pipe bracing for diagonal metal strips from the hardware aisle, screwed on with sheet metal screws so it won’t sway. Stain with a gray driftwood tone, then rub a whisper of warm walnut over it. Style it with plates, jars and greenery.
Get the full tutorial at The Crafty Blog Stalker.
23. DIY Napkin Paper Candle
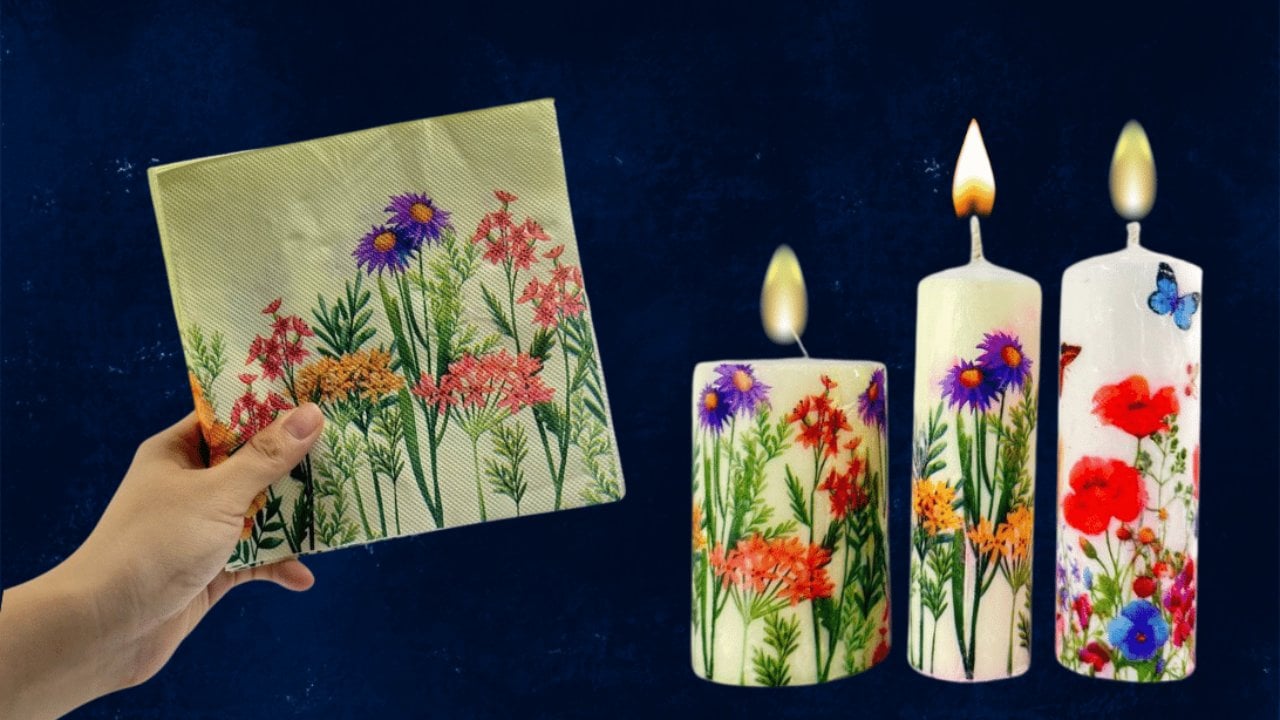
A DIY napkin paper candle dresses up a plain pillar in about five minutes. Separate a printed paper napkin and keep only the top printed layer. Cut it to size and wrap it around a clean candle, smoothing it on evenly. Cover it with a sheet of wax paper and tape it in place, then gently iron over it until the warmed wax fuses the napkin into the candle. Peel off the wax paper and iron any loose edges. Put an LED tealight on top to keep the design safe.
Get the full tutorial at DIY JOY.
24. Knock Off No Sew Dining Chair
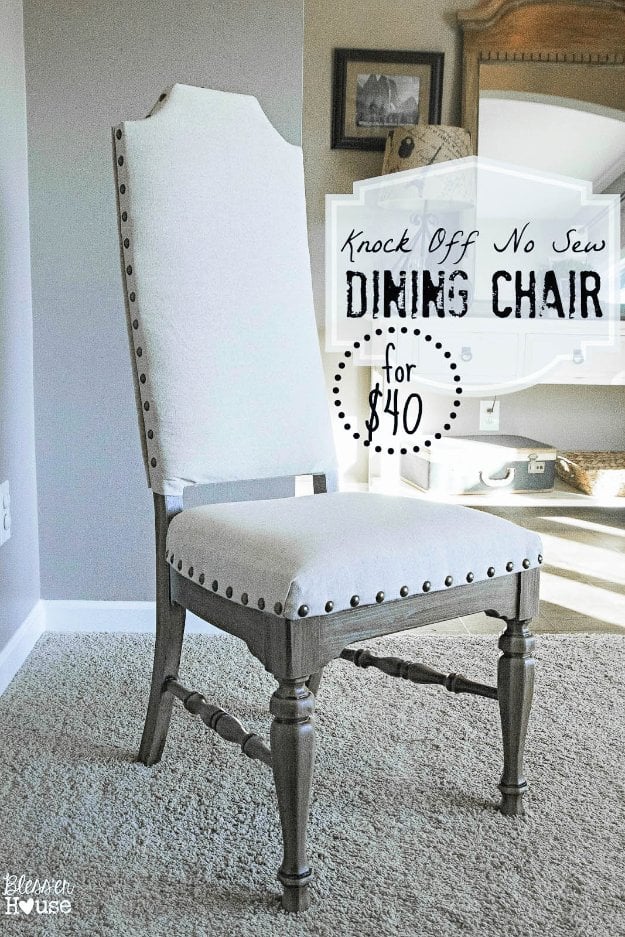
Designer upholstered chairs can run about $350 to $450 each, but a knock off no sew dining chair starts with $20 secondhand ones. Look for castoff chairs with good bones and simple turned legs. Strip off the old fabric, then reshape the back with new padding so it rises tall like the high end versions. Wrap it all in light linen or canvas, staple it underneath, and finish the edges with a row of nailhead trim. Give the legs a weathered gray wash so they look like aged oak.
Get the full tutorial at Bless'er House.
25. DIY Book Flower Vase
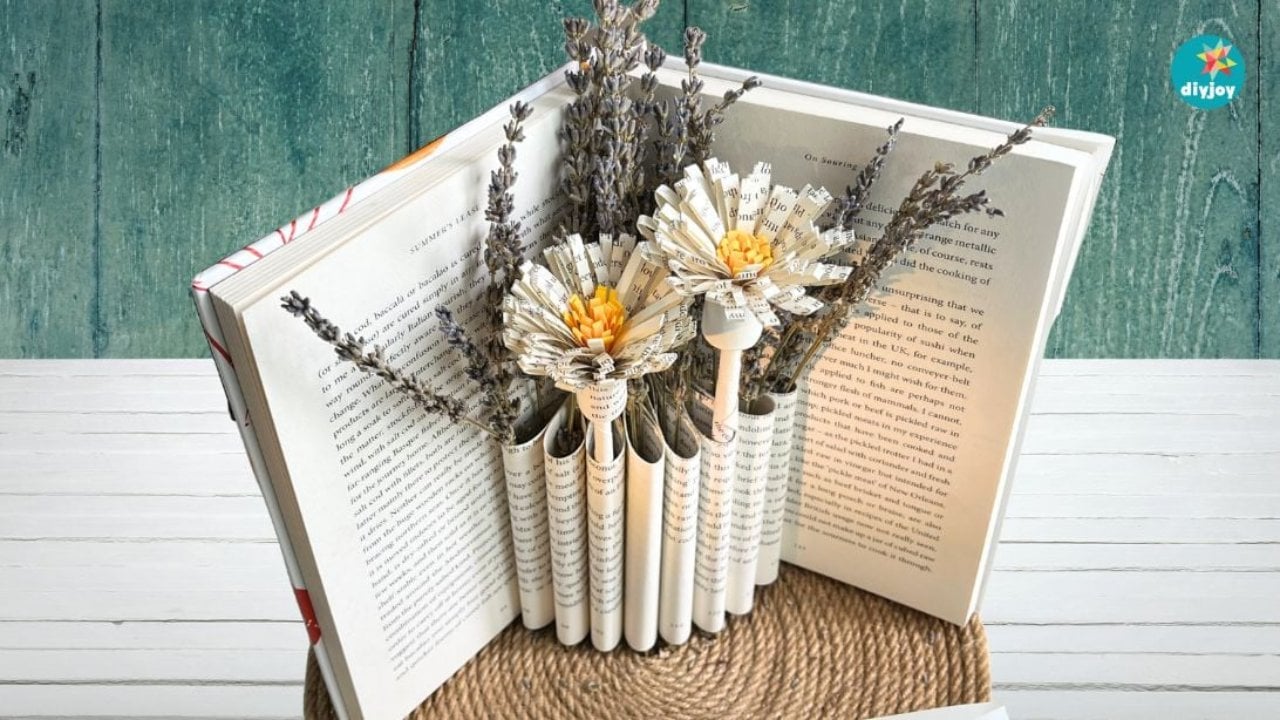
A DIY book flower vase gives a worn out paperback a second life on the table. Open the book to the middle and draw a straight line across the page. Count 12 pages to each side, slip cardboard underneath and cut along the line with a sharp blade, then tear off the top section. Tape the cut pages together in groups of three with double sided tape, and fold each group in toward the middle. Fill the pleated center with dried lavender, faux or paper flowers.
Get the full tutorial at DIY JOY.
26. How to Style a Dining Room Hutch

Styling a dining room hutch is easier with a simple system. Start with a theme or color scheme, like copper with white dishes and a few natural touches, to narrow your choices. Fill the back of each shelf with tall pieces that can lean, such as plates, frames, books or a tray. Then layer smaller items in front at different depths. Vary the heights by stacking ramekins or setting a piece on a small pile of books or coasters. Step back, edit and swap for each season.
Get the full tutorial at Abby Organizes.